Create a workspace
You can create a workspace in the Altimate web app, or from Altimate Code when you link a project to one.
In the web app
- Open Workspaces from the sidebar and click New workspace. The extension's Create your first workspace button opens this same page.
- Set up: give the workspace a name and describe what it works on.
-
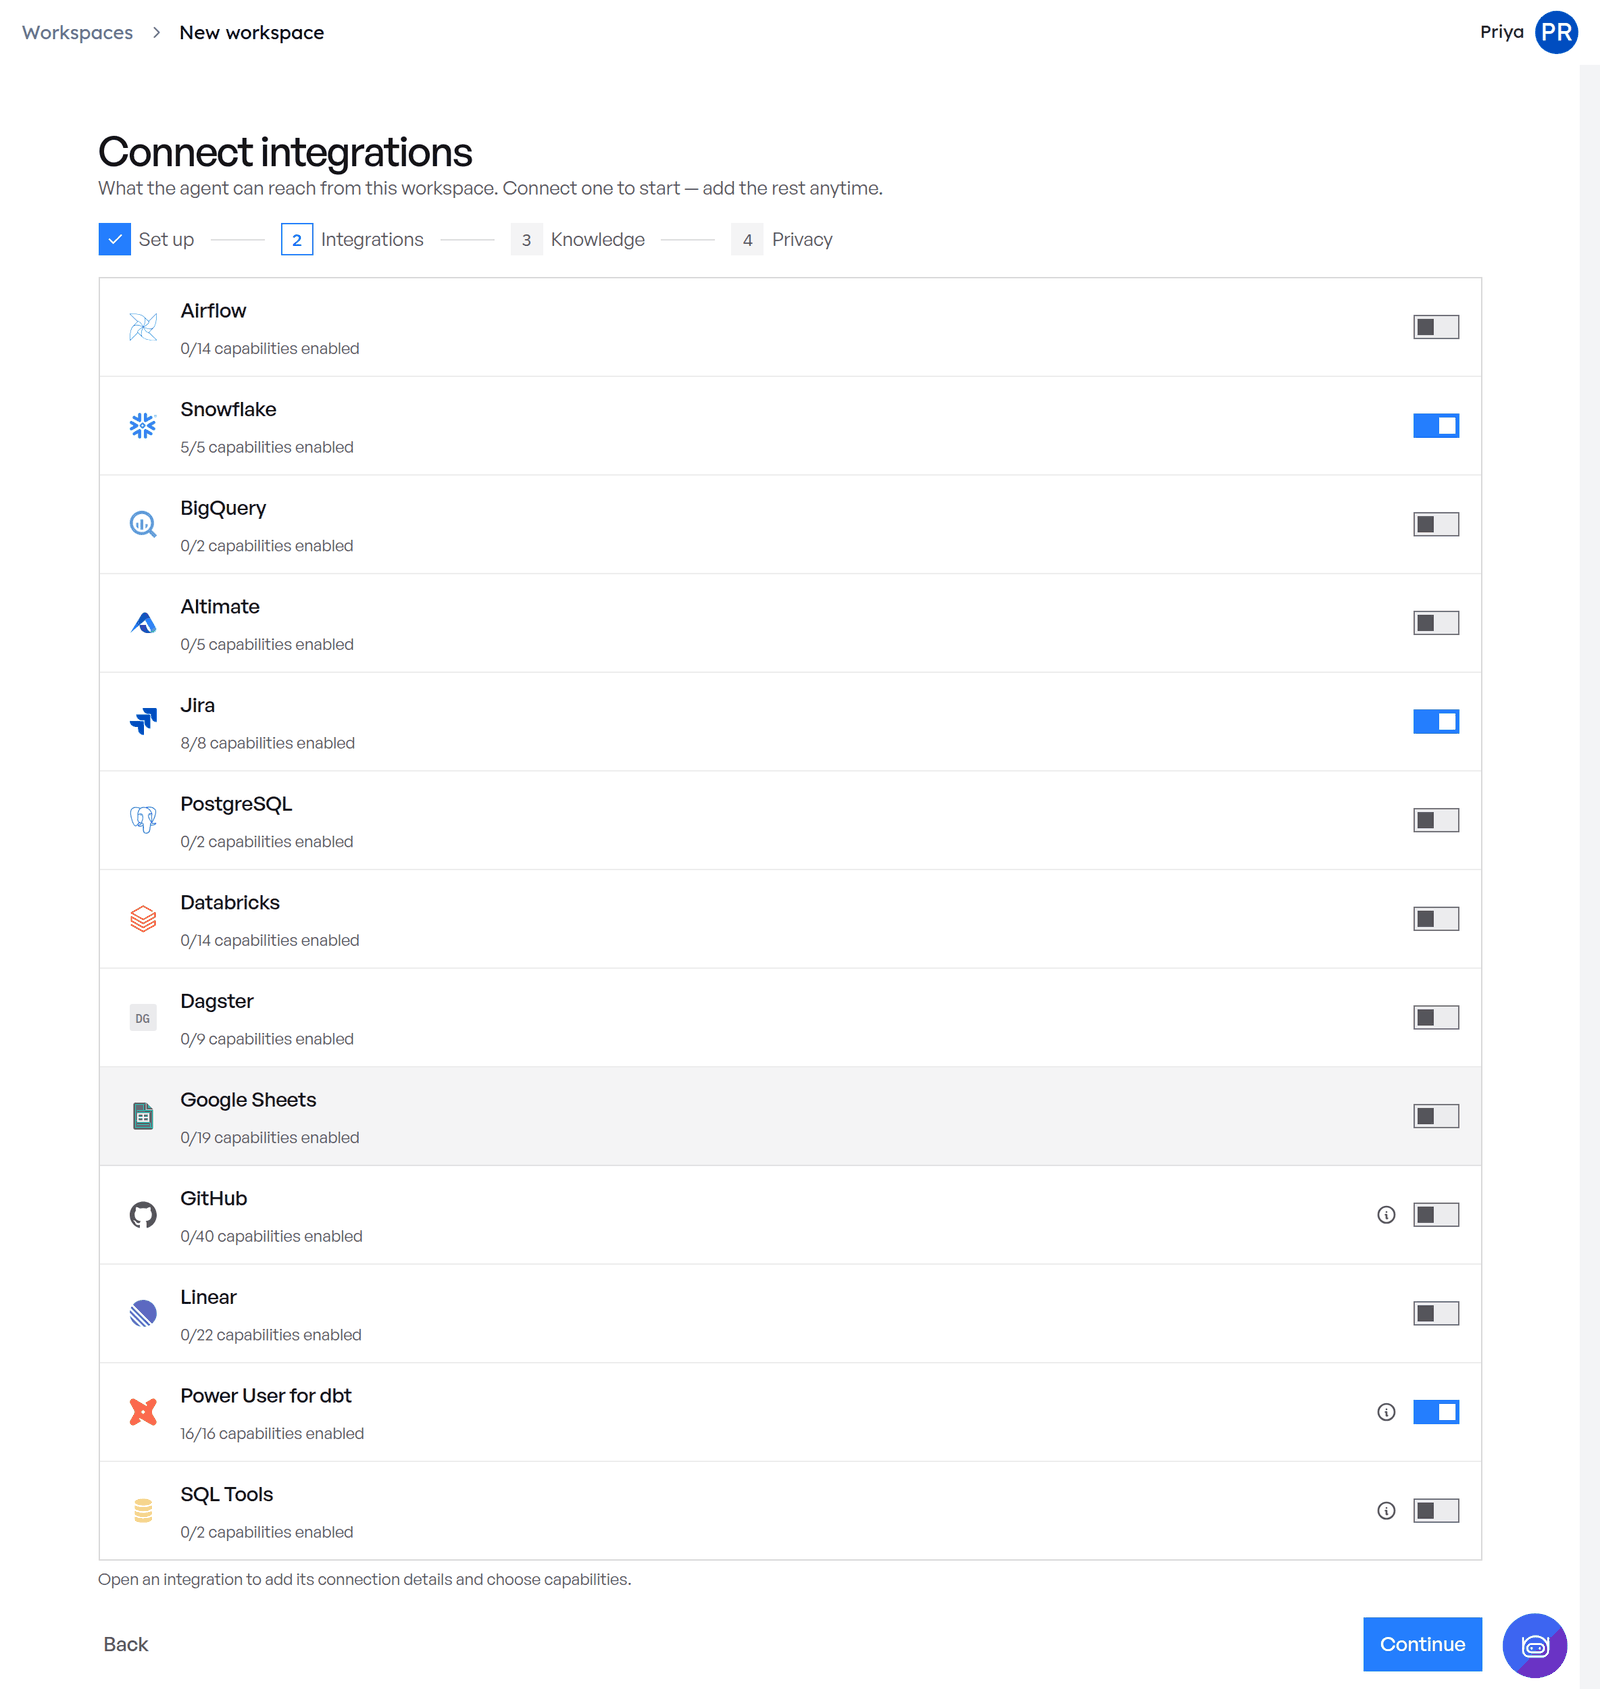
Integrations: switch on each system the agent should reach. Switching one on includes all of its capabilities and opens its settings, where you can add connection details, or skip them for now, and turn off capabilities you don't want. One is enough to start, and you can add the rest later. See Integrations.
-
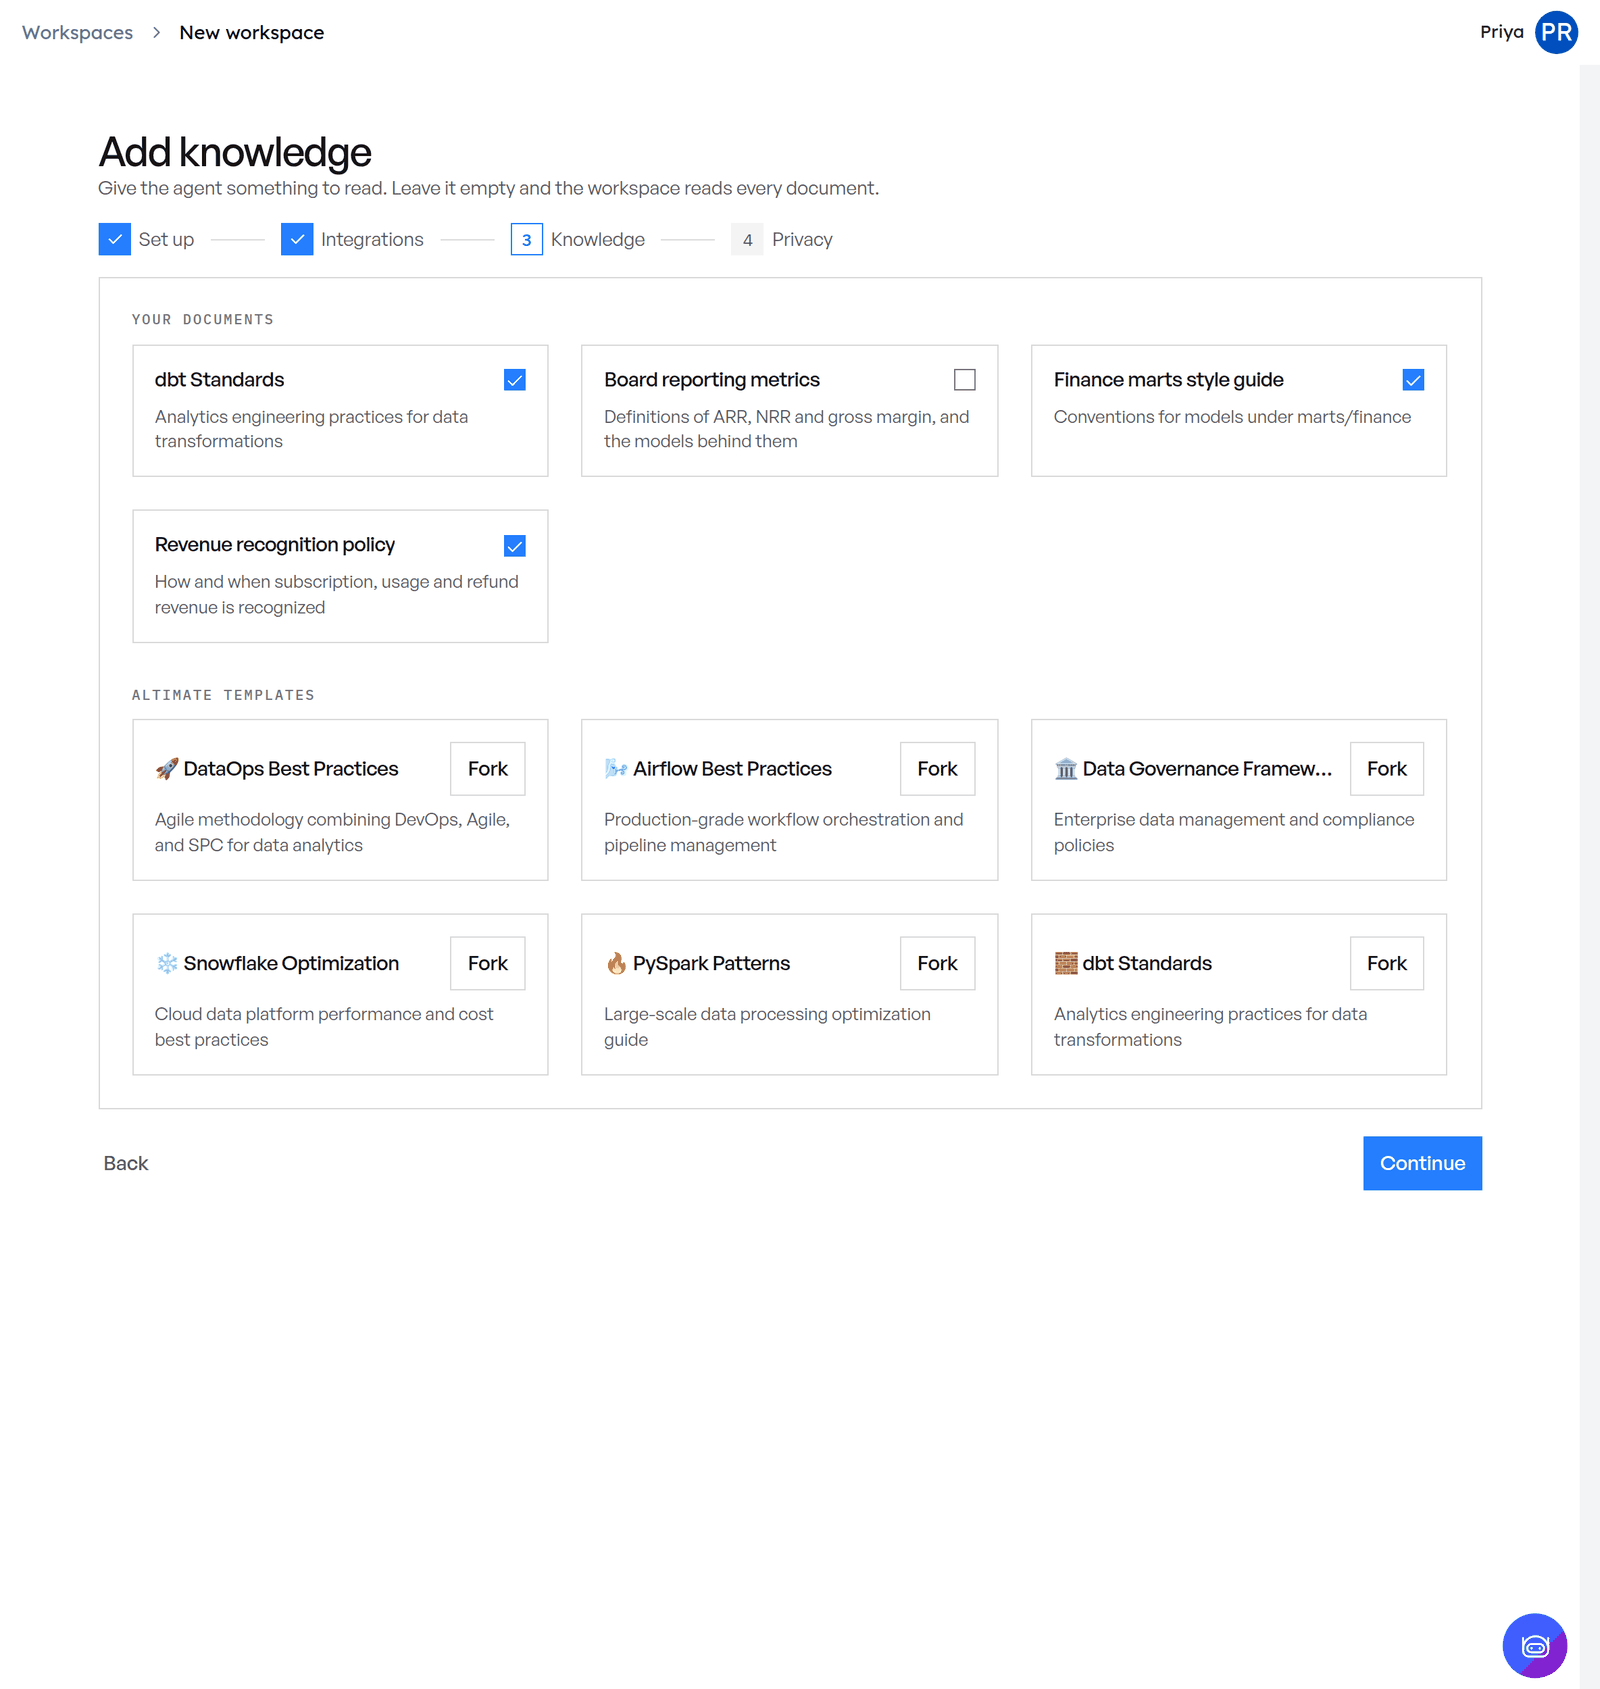
Knowledge: pick the documents the agent reads from Your documents, or Fork one of the Altimate templates to copy it into your documents. If you pick nothing, the workspace reads every document. See Knowledge Hub.
-
Privacy: choose Private (only you) or Public (everyone in your organization). To share with specific people or teams instead, create the workspace first, then change it on the workspace's Overview tab. See Share a workspace.
- Click Create workspace.
The new workspace opens on its Overview tab.
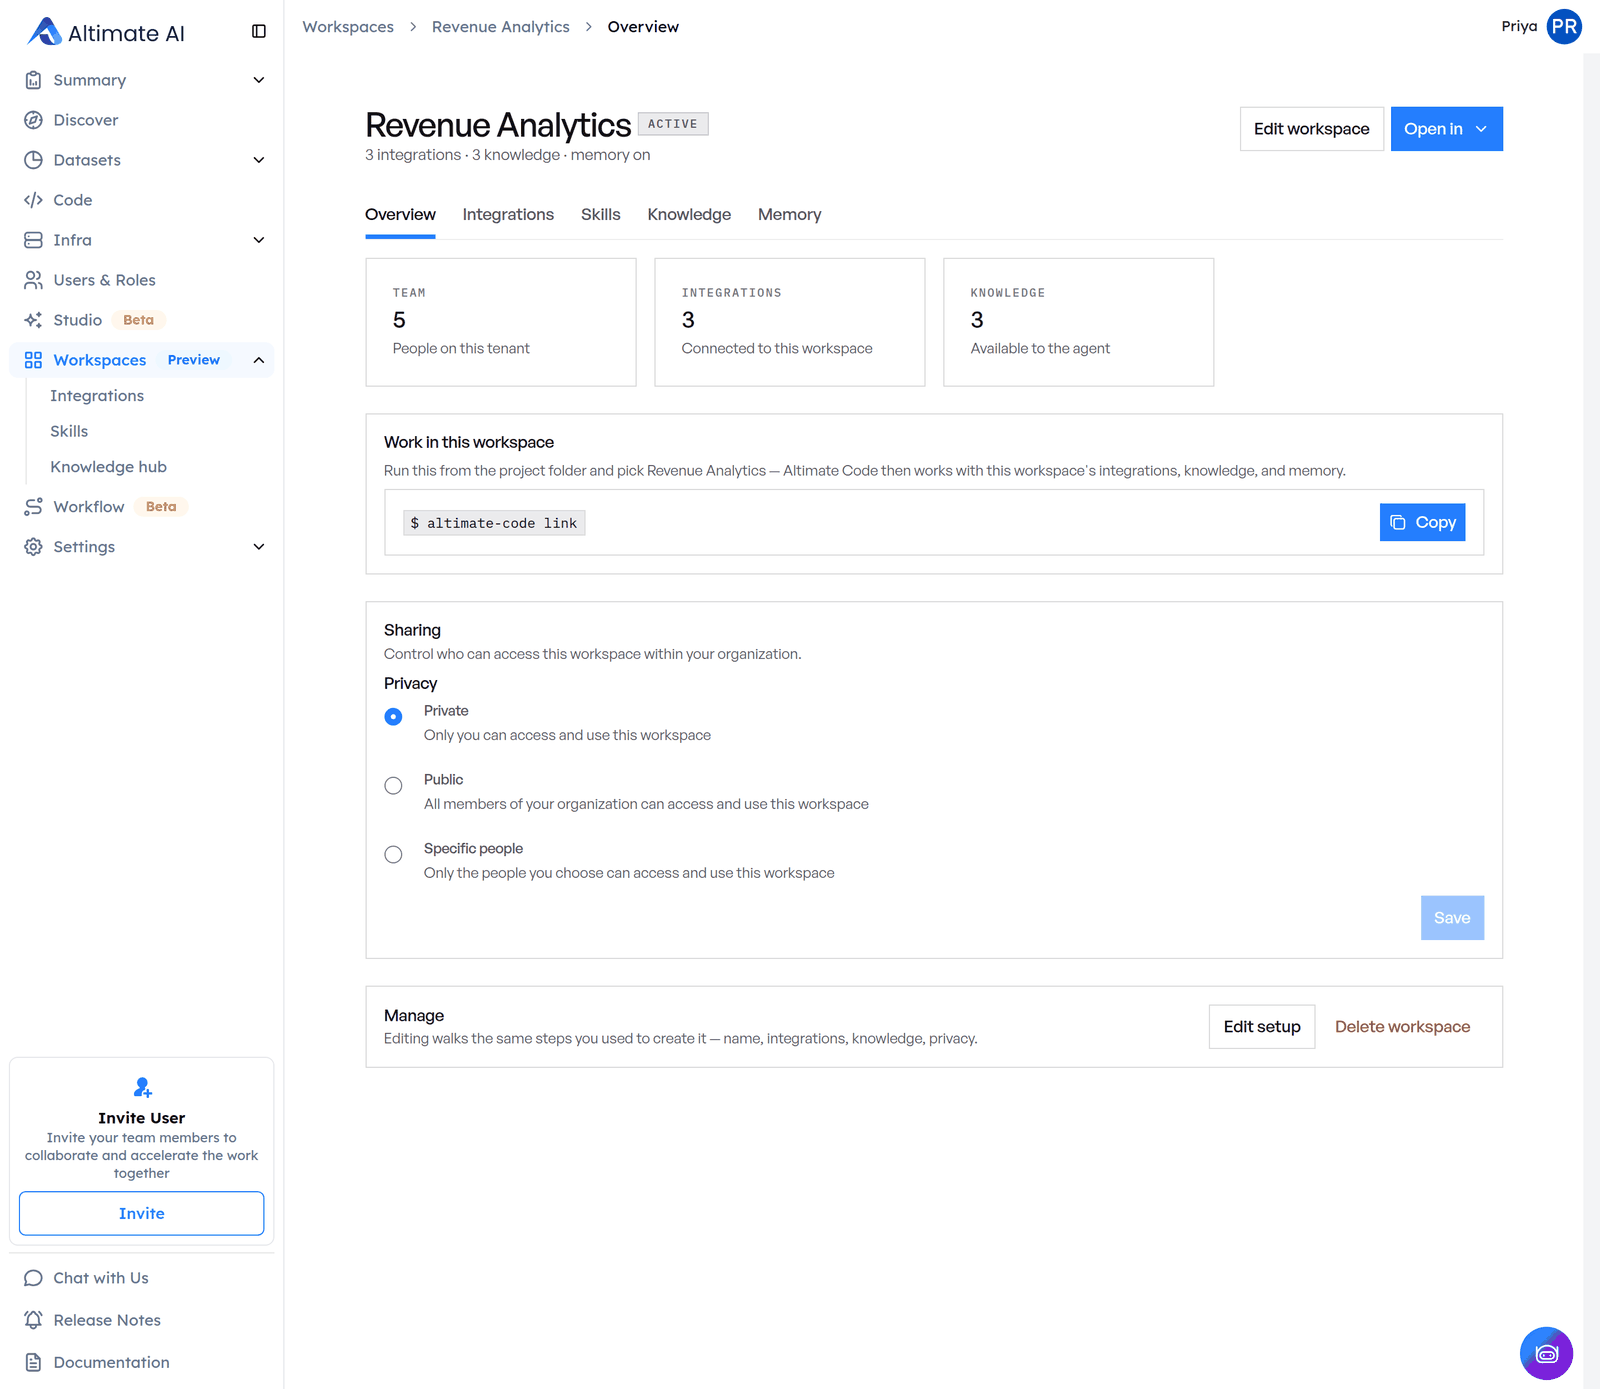
To change a workspace later, open it and click Edit workspace. The same steps open with your current setup, and Save workspace applies your changes.
From Altimate Code
Running altimate-code link in a project folder lets you pick an existing workspace or create a new one. If you create it in the browser, the web app shows the request as coming from the Altimate Code CLI. Click Create workspace, then Return to CLI to finish linking. See Use a workspace in Altimate Code.
What a new workspace starts with
Every new workspace starts with memory and the knowledge engine on, however you create it. To turn memory off, open the workspace's Memory tab and switch off Remember from sessions. See Memory Hub and Knowledge Hub.